
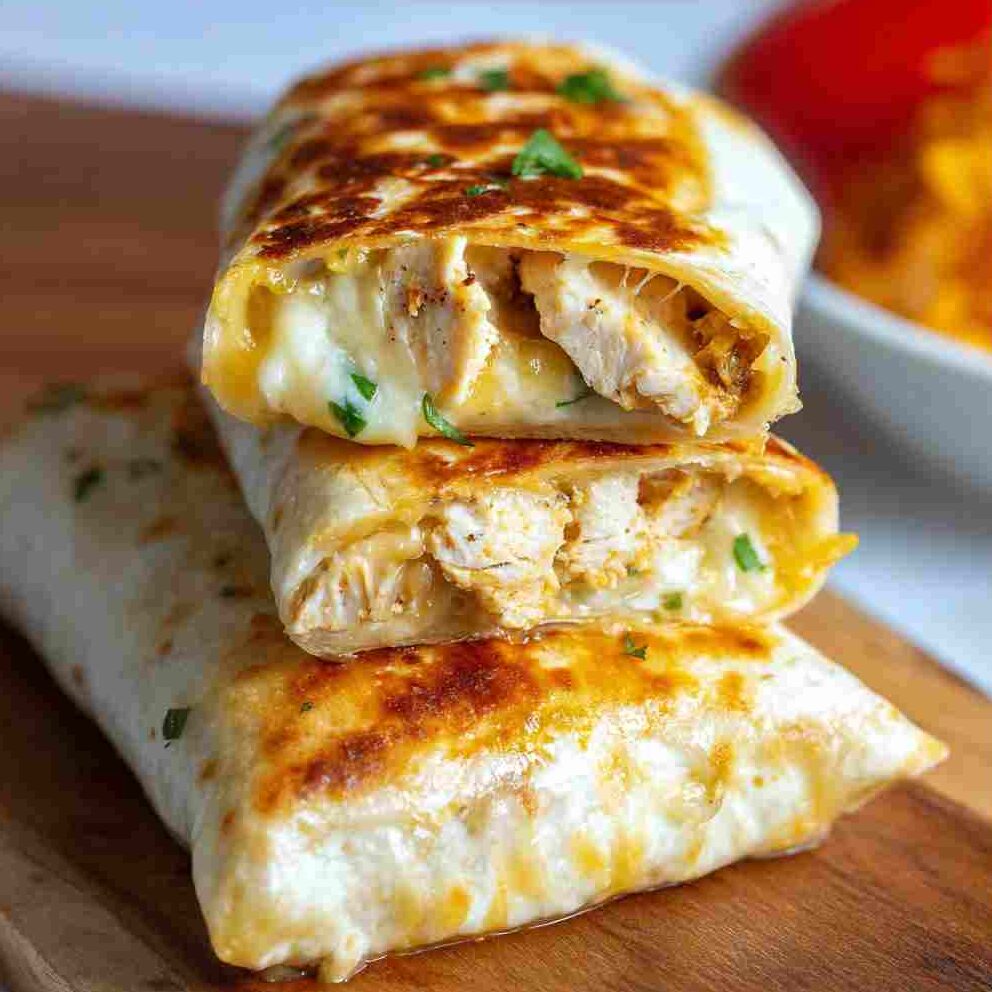
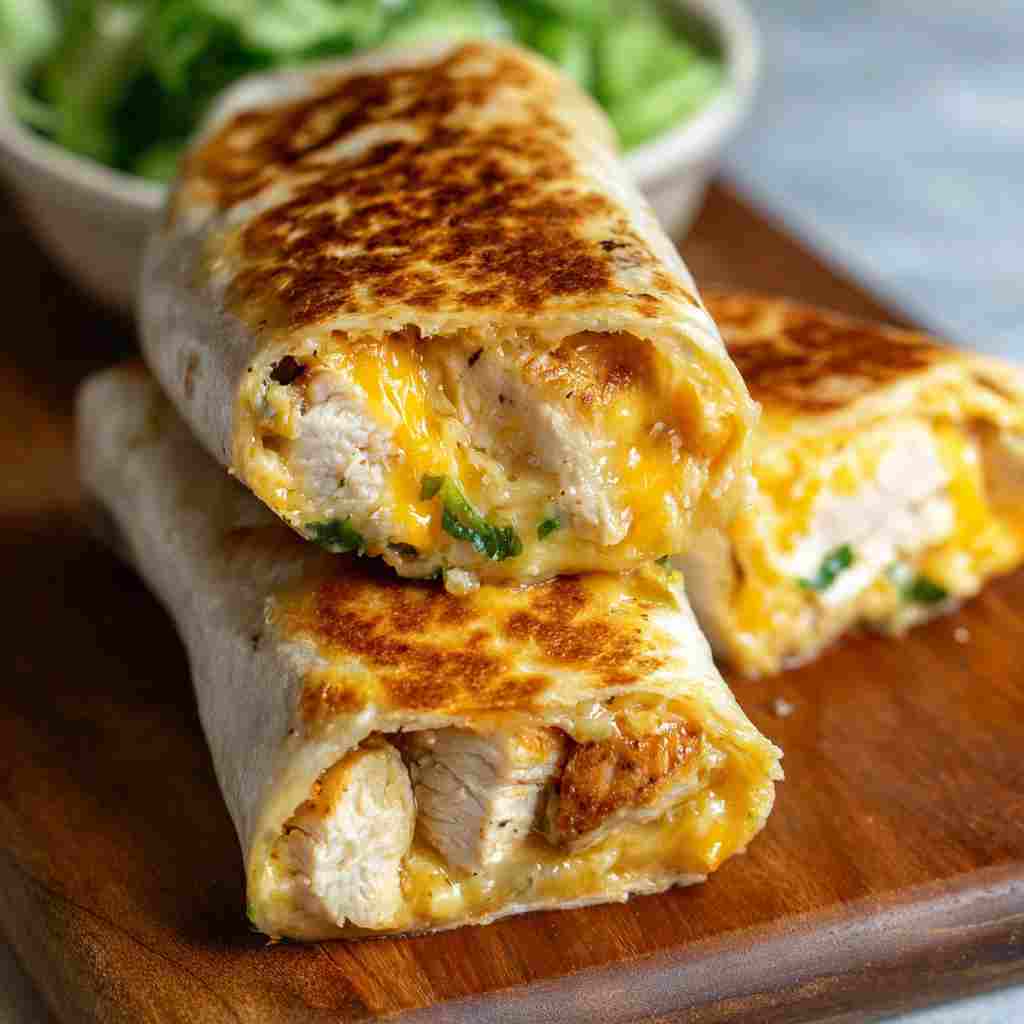
These Cheesy Garlic Chicken Wraps are the ultimate comfort food for anyone looking for a quick, high-protein meal. With a crispy golden exterior and a melty, garlicky center, they are perfect for a satisfying lunch or a stress-free dinner. You will love how the punchy garlic flavor pairs with the creamy chicken filling to create a restaurant-quality wrap right in your own kitchen.
Table of Contents
Why You Will Love This Recipe
There are so many reasons to keep this recipe in your weekly rotation. First, it is a low-effort, high-reward meal that uses simple ingredients you likely already have in your pantry. It is incredibly flexible, allowing you to use regular wheat tortillas or low-carb, high-protein wraps depending on your dietary needs. The contrast between the crunch of the toasted tortilla and the gooey, cheesy filling is addictive. Plus, the chicken filling can be made in advance, making it a fantastic option for busy professionals or parents who need a fast meal prep solution.
Ingredients
- Large tortillas (regular wheat or low-carb/high-protein)
- Cooked chicken (rotisserie chicken or leftovers work perfectly)
- Fresh garlic cloves (grated or minced)
- Light mayonnaise
- Light Greek yogurt or plain yogurt
- Hot sauce (such as Frank’s)
- Salt
- Shredded cheese (cheddar or a melty blend)
- Green onion (chopped)
- Olive oil spray
Step-by-Step Instructions
- In a medium mixing bowl, combine the chopped cooked chicken, minced garlic, light mayonnaise, Greek yogurt, hot sauce, and a pinch of salt. Stir until the chicken is well-coated.
- Lay your tortilla flat on a clean surface. On the lower third of the wrap, sprinkle about two tablespoons of shredded cheese.
- Top the cheese with approximately 2/3 cup of the garlic chicken mixture.
- Add another tablespoon of cheese and a generous sprinkle of chopped green onions over the chicken.
- Fold in the sides of the tortilla and roll it up tightly from the bottom to ensure the filling stays inside.
- Heat a non-stick skillet over medium-high heat and lightly coat it with olive oil spray.
- Place the wraps in the pan seam-side down. Cook for 3 to 4 minutes per side until the exterior is golden brown and crispy.
- Place a lid over the pan while cooking to help the heat penetrate the center and melt the cheese faster.
- Once crispy on all sides, remove from the heat, slice in half, and serve immediately.
Expert Tips / Pro Tips
To get the best results with your Cheesy Garlic Chicken Wraps, always use a lid when pan-frying. This traps the steam and ensures the cheese is perfectly gooey without burning the outside of the tortilla. If you prefer using an air fryer, you can cook these at 375°F (190°C) for about 6 to 8 minutes. Another great tip is to grate your own cheese from a block; pre-shredded cheese often has anti-caking agents that prevent it from melting as smoothly as fresh cheese.
Variations & Substitutions
This recipe serves as a fantastic base for customization. If you want to add more texture or nutrition, consider adding sliced avocado, sun-dried tomatoes, or fresh spinach inside the wrap before rolling. For a bit of a Mediterranean twist, you could swap the hot sauce for lemon juice and add olives or feta cheese. If you do not have green onions, chives or finely diced red onions provide a similar sharp bite. For those who want a lighter version, simply reduce the amount of cheese used in the center.
Serving Suggestions
These wraps are quite filling on their own, but they pair beautifully with a variety of sides. Serve them alongside a crunchy garden salad or a bowl of roasted vegetables for a balanced meal. If you enjoy dipping, try a side of salsa, extra hot sauce, or a light ranch dressing. For a classic deli-style experience, serve them with pickles and a handful of your favorite chips.
Storage, Freezing & Reheating
If you have leftovers, you can store the cooked wraps in the refrigerator for up to 2 days. To maintain the crispy texture, it is best to reheat them in a dry skillet or an air fryer rather than the microwave. While the fully assembled wraps do not freeze well because the tortilla can become soggy, the garlic chicken filling is very freezer-friendly. You can freeze the filling in an airtight container for up to 1 month. When you are ready to eat, thaw the filling in the fridge overnight, wrap it in a fresh tortilla, and cook as directed.
Nutrition Information
| Nutrient | Amount per Serving |
|---|---|
| Calories | 476 kcal |
| Protein | 38 g |
| Carbohydrates | 19 g |
| Fat | 27 g |
| Saturated Fat | 11 g |
| Fiber | 1 g |
| Sodium | 1090 mg |
Cheesy Garlic Chicken Wraps
Ingredients
Method
- In a medium mixing bowl, combine the chopped cooked chicken, minced garlic, light mayonnaise, Greek yogurt, hot sauce, and a pinch of salt. Stir until the chicken is well-coated.Cooked chicken, Fresh garlic cloves, Light mayonnaise, Light Greek yogurt, Hot sauce, Salt
- Lay your tortilla flat on a clean surface. On the lower third of the wrap, sprinkle about two tablespoons of shredded cheese.Large tortillas, Shredded cheese
- Top the cheese with approximately 2/3 cup of the garlic chicken mixture.
- Add another tablespoon of cheese and a generous sprinkle of chopped green onions over the chicken.Shredded cheese, Green onion
- Fold in the sides of the tortilla and roll it up tightly from the bottom to ensure the filling stays inside.
- Heat a non-stick skillet over medium-high heat and lightly coat it with olive oil spray.Olive oil spray
- Place the wraps in the pan seam-side down. Cook for 3 to 4 minutes per side until the exterior is golden brown and crispy.
- Place a lid over the pan while cooking to help the heat penetrate the center and melt the cheese faster.
- Once crispy on all sides, remove from the heat, slice in half, and serve immediately.
Notes
FAQ
Can I use raw chicken for this recipe?
No, this recipe is designed for pre-cooked chicken. If you have raw chicken breasts, you should poach, grill, or pan-fry them first before chopping them up to mix with the garlic and sauce.
What is the best way to keep the wrap from falling apart?
The secret is to place the wrap seam-side down in the hot pan first. The heat will “seal” the tortilla edges together, keeping the filling secure while you flip it to brown the other side.
Can I bake these in the oven?
Yes, you can bake these at 400°F (200°C) for about 10 to 12 minutes. Be sure to flip them halfway through. However, for the absolute best crunch, the pan-fry or air fryer methods are recommended.
Is this recipe spicy?
It has a mild kick from the hot sauce, but you can easily control the heat. If you prefer a very mild wrap, reduce the hot sauce to one teaspoon or omit it entirely in favor of a little extra Greek yogurt.